Angular Model - Simple state management with minimalist API, one way data flow, multiple model support and immutable data exposed as RxJS Observable.
Angular Model - @angular-extensions/model
by @tomastrajan
Simple state management with minimalistic API, one way data flow,
multiple model support and immutable data exposed as RxJS Observable.
- Live Demo (Stackblitz)
- Getting Started
- Code of Conduct
- Contributing
- Changelog
- Documentation website
- Advanced Usage Patterns with more how-tos and examples
- Blog about introduction to Angular Model Pattern
Documentation

Getting started in Angular CLI projects
-
Install
@angular-extensions/modellibraryng add @angular-extensions/model -
Generate model service
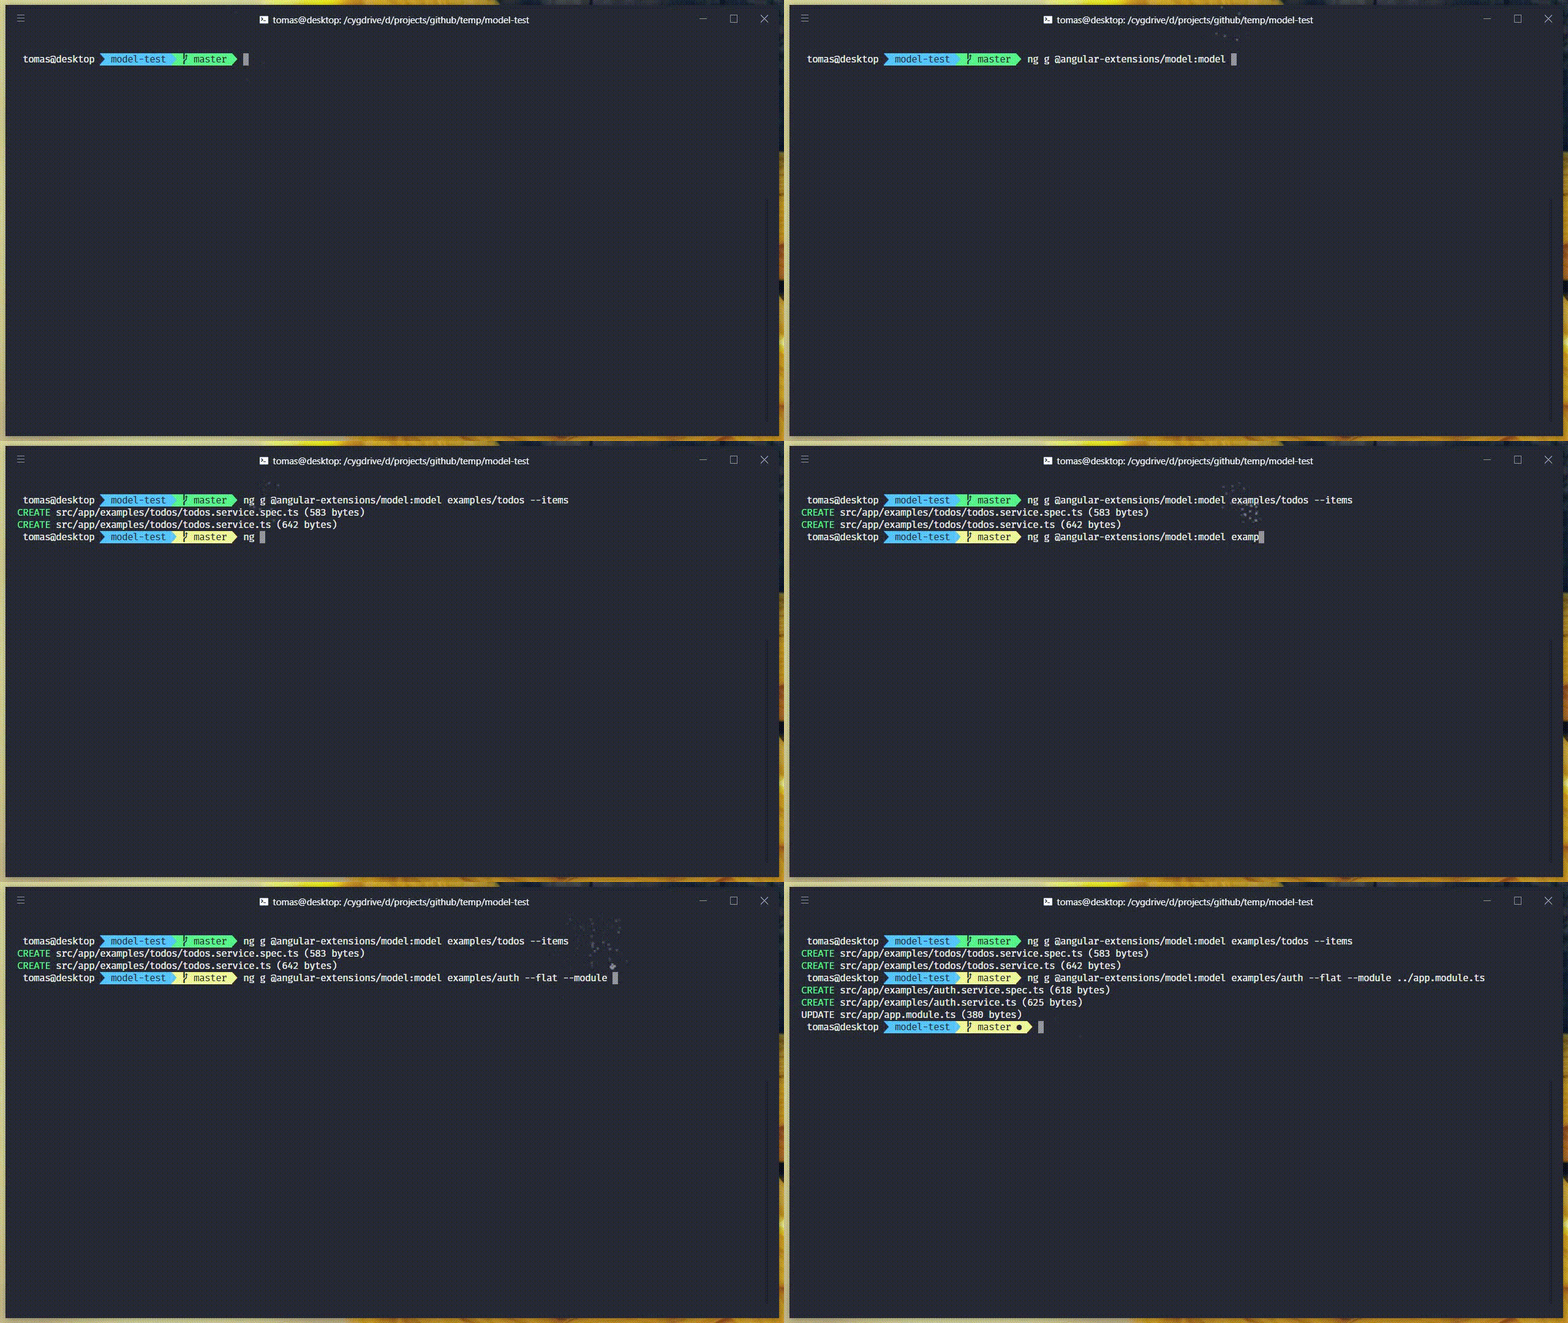
ng g @angular-extensions/model:model examples/todo --items -
Use model service in your component. Let’s generate new
todocomponentng g component examples/todo --inline-templateAnd then adjust component implementation as in the example below
import { Component } from '@angular/core'; import { TodoService } from './todo.service'; @Component({ selector: 'app-todo', template: ` <!-- template subscription to todos using async pipe --> <ng-container *ngIf="todoService.todos$ | async as todos"> <h1>Todos ({{ todos.length }})</h1> <ul> <li *ngFor="let todo of todos"> {{ todo.prop }} </li> </ul> <button (click)="addTodo()">Add todo</button> </ng-container> `, styleUrls: ['./todo.component.css'] }) export class TodoComponent { constructor(public todoService: TodoService) {} addTodo() { this.todoService.addTodo({ prop: 'New todo!' }); } } -
Use our new
<app-todo></app-todo>component in the template of theapp.component.html
Please mind that you might be using different application prefix than app- so adjust accordingly.
Model API
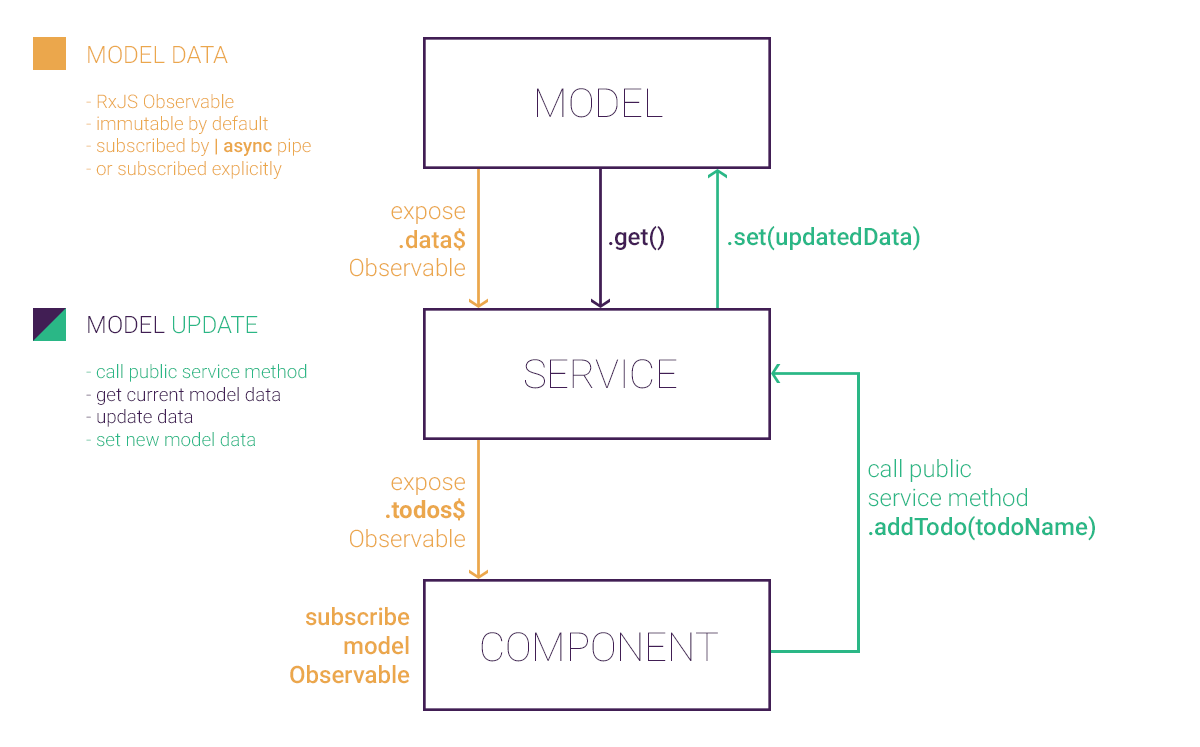
The model has a small API that as shown in in the illustration above.
get(): T- returns current model valueset(data: T): void- sets new model valuedata$: Observable<T>- observable of the model data, every callset(newData)will push new model state to to this observable (the data is immutable by default but this can be changed using one of the other provided factory functions as described below)
Check out generated todo.service.ts to see an example of how the model should be used.
In general, the service will implement methods in which it will retrieve current model state, mutate it and set new state back to the model.
Model will then take care of pushing immutable copies of the new state to all components which are subscribed using data$.
Available Model Factories
Models are created using model factory as shown in example todo.service.ts, check line this.model = this.modelFactory.create(initialData);.
Multiple model factories are provided out of the box to support different use cases:
create(initialData: T): Model<T>- create basic model which is immutable by default (JSONcloning)createMutable(initialData: T): Model<T>- create model with no immutability guarantees (you have to make sure that model consumers don’t mutate and corrupt model state) but much more performance because whole cloning step is skippedcreateMutableWithSharedSubscription(initialData: T): Model<T>- gain even more performance by skipping both immutability and sharing subscription between all consumers (eg situation in which many components are subscribed to single model)createWithCustomClone(initialData: T, clone: (data: T) => T)- create immutable model by passing your custom clone function (JSONcloning doesn’t support properties containing function or regex so custom cloning functionality might be needed)createWithConfig(config)- create model by passing in config object with values of all configuration properties (initialData: T,immutable: boolean,sharedSubscription: boolean,clone: (data: T) => T)
Model Schematics API
Model services are generated using Angular CLI. It is a 3rd party schematics so we have to
specify it when running ng g command like this ng g @angular-extensions/model:<schematics-name> <schematics parameters>.
The schematics currently contains only one schematic called model.
Basic usage
ng g @angular-extensions/model:model example/todo
Supported options
--items- creates service for collection of items (it will exposetodos$: Observable<Todo[]>;instead oftodo$: Observable<Todo>)--flat- generates service file directly in theexamplesfolder without creating folder with the nametodos(default:false)--spec- generate service test file (default:true)--module- will decide how to register service into Angular dependency injection context (service will useprovidedIn: 'root'when no module was provided, module can be provided as a path to module relative to the location of generated service, egng g @angular-extensions/model:model examples/auth --module ../app.module.ts)--project- project in which to generate the service (for multi project Angular CLI workspaces, will generate service in the first project by default, when no project was provided)

Getting started without Angular CLI
It is also possible to use @angular-extensions/model in Angular project which do not use Angular CLI.
-
Install
@angular-extensions/modellibrarynpm i -S @angular-extensions/model -
Create new model service in
src/app/examples/todo/todo.service.tsimport { Injectable } from '@angular/core'; import { Model, ModelFactory } from '@angular-extensions/model'; import { Observable } from 'rxjs'; const initialData: Todo[] = []; @Injectable({ providedIn: 'root' }) export class TodoService { private model: Model<Todo[]>; todos$: Observable<Todo[]>; constructor(private modelFactory: ModelFactory<Todo[]>) { this.model = this.modelFactory.create(initialData); this.todos$ = this.model.data$; } addTodo(todo: Todo) { const todos = this.model.get(); todos.push(todo); this.model.set(todos); } } export interface Todo { prop: string; } -
Use new model service in some of your components as described in point 3 and above in
Getting started in Angular CLI projectssection
Relationship to older Angular Model Pattern and ngx-model library
This is a new enhanced version of older library called ngx-model which was in turn implementation of Angular Model Pattern.
All the original examples and documentation are still valid. The only difference is that
you can add @angular-extensions/model with ng add instead of installing ngx-model or having to copy model pattern
implementation to your project manually.
One of the changes compared to ngx-model is that the @angular-extensions/model uses new
providedIn: 'root' syntax (since Angular 6) so that we don’t need to import NgxModelModule
or anything similar to register ModelFactory into Angular dependency injection (DI) context.
All we have to do is to import ModelFactory in the constructor of at least one service in our
application like this constructor(private modelFactory: ModelFactory<SomeType[]>) {} and we’re
good to go. This new feature is called tree-shakeable providers:
There is now a new, recommended, way to register a provider, directly inside the @Injectable() decorator, using the new providedIn attribute. It accepts ‘root’ as a value or any module of your application. When you use ‘root’, your injectable will be registered as a singleton in the application, and you don’t need to add it to the providers of the root module. Similarly, if you use providedIn: UsersModule, the injectable is registered as a provider of the UsersModule without adding it to the providers of the module (source)
Migration from ngx-model
Migration should be rather simple, please follow these steps:
- remove dependency to
ngx-model - install
npm i -S @angular-extensions/model - remove
NgxModelModulefrom imports of your@NgModuleinApporCoremodule based on where you added it - search and replace imports from
ngx-modeland replace them with@angular-extensions/model - this should be it! The API didn’t change so this should be all that it takes to migrate to the new package
- (optional) refactor your existing model services to use
@Injectable({ providedIn: 'root' })(or other module instead ofroot)
instead of@Injectable()and remove them from@NgModule({ providers: [MyModelService] })of your modules
The 6th step depends on your preferences, it is still possible to use new @angular-extensions/model with classic
providers, just use --module <relative-path-to-module> flag when generating new model services using schematics
Contributing
Please, feel free to submit and issue
or feature request using project GitHub repository.


